Chicken Salami Rolls

Its one of those cold days.. You’re sleeping cozy in your blanket, all warmed up, little one still fast asleep, your eyes blink, fully intending to go back to sleep and your mind pushes you to do only one little thing, look at the clock. Bam!

You know you don’t have a choice.

Being a stay at home mom I very often hear ‘Oh, great! You get to be home all day!’ Yes, I do get to be home all day, everyday. It’s the same routine most days, no sick days or holidays, my boss (read my baby) doesn’t accept any excuses and I would really like to be by myself a little (especially in the washroom) 😛
I’m not saying working women have it easy, I’m saying sahms don’t either! It would help if we weren’t such bitc*es about it.

So, yes, by evening I had a strong craving to have something very very unhealthy and delicious and spicy.. I was leaning towards having a Chicken roll. So now I had to feed and dress my toddler up, get ready, get a ride to this small joint, and eat while entertaining my preschooler, who for sure wouldn’t  let me take a seat even. Suddenly the prospect of having that roll wasn’t so appealing anymore..

Luckily for me, we had a pair of hotdog buns in the fridge. Mission junk accomplished.

What you will need

2 hot dog buns
1 large onion
4-5 cloves of garlic
4 tomatos, blanched, peeled and pureed
7-8 chicken salamis
1 tsp turmeric powder
1/2 tsp ground pepper
4 tbsp grated mozzarella cheese
Butter, to spread as required
Chilly powder, to taste
Salt, to taste

Cut the salami in long strips and deep fry it until crisp.

In a skillet, take some oil and add chopped garlic. Fry for a minute or so and add chopped onions. Once onions are soft add tomato puree and allow to cook on a slow flame until it leaves oil.
You may also use a pack of ready tomato puree instead.
Once the mixture starts leaving oil, add turmeric, chilly powder, ground pepper and mix well. It should have a thick gravy consistency. Allow it to come to a boil. Now your gravy is done.

Slit the hot dog buns midway in the center. Slather the insides with butter and stuff some of the ready gravy. Fill it with some stripes of fried salami and top it with some cheese.  Microwave the filled buns for 30 seconds and serve immediately.

These are perfect take aways for older kids and adults alike, each bun cut into two serves as great party food and well, we could have these anytime of the day! 😀

Sugar cookies


It’s Christmas time again and as usual we’re all bustled up between decorating the Christmas tree, baking plum cakes, making cupcakes for school parties and donning out these lovely delish cookies! 

Sugar cookies are the most basic of cookies.. Simple, with the most handy ingredients and and effortless method. Best part about them is that you can refrigeratee the dough for a day, baking in small batches as you please

We’ll go into the decoration of these cookies in the next post that’s coming soon enough.. Until then, enjoy this one!

What you will need

1 large egg, room temperature
1tsp vanilla extract
1 cup butter, unsalted at room temperature
1 cup powdered sugar
1/4 tsp salt
2 1/2 cups all purpose flour, plus for dusting
In a small bowl, whisk together egg, salt and vanilla and put aside.

In a large bowl, cream the butter using a hand beater or a wooden spoon, until fluffy. Scrape down the sides with a rubber spatula during every addition.

Add sugar and continue beating for 2 to 3 minutes. The butter will now have a light sunny glow.

Add the egg mixture to this and beat for another 2 to 3 minutes

Sift the salt and flour together.

Add this mixture, little at a time to the butter while beating on low speed. Continue till all the flour is encorporated.

Divide the dough in to 2 parts. Wrap them in cling wrap and shape into disks. Refrigerate for 30 to 45 minutes.

Now roll the disk on a lightly dusted parchment paper to 1/4th inch thickness.

 Refrigerate for 2 to 24 hours.

Preheat the oven 165 C

Cut shapes using a cookie cutter at an inch distance. 

Now remove the excess cookie dough and allow the shapes to remain on the parchment paper itself

If at any point you feel the dough is getting difficult to handle, pop it in the fridge and let it chill for 30 minutes to an hour and begin working again.

Pop the parchment paper on your baking tray and cook for 15 to 20 minutes. Keep checking for browning, once the edges start to brown, it means the cookie is done.

Cream of chicken soup


Come December, find those jackets, burrow in those sweaters.. rub your hands together.. I wish. Here is December and Mumbai is seasoned with hot sun and an extra helping of scortching… then there are the mildly cool nights, which is the perfect recipe for……… sickness. You heard it right. Hubby and bub, both out cold. So time for ‘Chicken soup for the recovering soul…’
This soup is, no doubt, perfect for any season and especially the winters. It’s calming, soothing, gentle warmth going down your throat.. and best of all, it’s pretty simple..

What you will need

For the broth
200gm of bony chicken pieces
100 gm of boneless chicken
2 medium sized carrots, cut in chunks
1 1/2 cup shredded cabbage
1 stalk of celery
2 onions, cut in chunks
10-12 garlic cloves
1/2 inch piece of ginger
1 tbsp vinegar
1 tsp salt
8-10 pepper cons
2 lits of water

For the soup
3 tbsp butter
2 tbsp all purpose flour*
1/2 carton cream
Ground pepper for garnish

Start with a large thick bottomed container and add all the stock ingredients to it.
You may choose to steam the boneless pieces seperately and add them to the soup or add them in the stock itself. Only main difference will be the colour.. the colour of the chicken from the broth won’t be as white.

Allow the stock to come to a boil on medium high flame. Now reduce the flame to slow, cover and allow it simmer until the stock reduces to half. Allow it to cool down and
Strain the broth.

Seperate the chicken pieces and discard the remaining.
Your base stock is ready. This stock by itself is very nutritious and can be given to all kids of all age groups (6 months plus)

For making the soup, heat the butter in a pan and add the flour. Stir constantly on low heat for 2 to 3 minutes. Now add just half a cup of the broth and stir so there are no balls of flour formed. Now add the remaining broth along with the chicken pieces and bring to a boil. Add salt and cream and stir gently. Allow to simmer on medium flame for 2 more minutes.. give it a quick stir to check to consistancy. If you find the soup to be runny for your liking, allow it to simmer for a little longer.
Ensure not to boil the soup once the cream is added.

*NOTE: For a helthier version of this soup, replace the all purpose flour with finely ground oats powder.

Ukdiche Modak

Post the Shravan month which is the Hindu version of lent, meat and alcohol among other things is forbidden. This month is followed by Bhadrapad which signifies the arrival of our favourite God, Ganesha in our homes and streets. This beautiful Elephant God is plump and a major foodie.. (both of us have that in common!) 

One of his favourite delicacy is supposed to be Modak! We spend the Ganesh Chaturthi morning hand rolling about 40 -50 Modaks, which is actually a fairly small number. Peeps easily (and happily) consume upto 6-7 of these per head.
This is basically a steamed dumpling from rice flour covering and a sweet filling of jaggrey and fresh coconut. Everyone in our family simply loves modaks.. drenched in ghee, faintly smelling of nutmeg.. it’s heaven on your mouth. 
What you will need

For the filling

  • 1 cup freshly grated coconut
  • 1 cup grated jaggrey
  • 1/2 tsp nutmeg powder
  • 1/2 tsp cardamom powder
  • 1tbsp ghee

For the covering

  • 1 cup rice flour
  • 1 cup water
  • 1 tsp ghee
  • Salt to taste

Some oil for rolling the Modaks

Lets start by getting out filling ready. In a heavy bottomed pan, add ghee, coconut and Jaggrey and mix well. Cook on slow flame until the jaggrey melts and it becomes a homogenous mixture. Add the cardamom and nutmeg powder just before turning the gas off and mix well. 

Now for the outer covering. 
In a heavy bottomed pan, add water with ghee and salt and allow it to warm up. Once hot and the rice flour little by little while mixing it with a spatula. Make sure you see no dry flour. Now cover the container with a lid and allow to cook on a slow flame. Switch off the flame once it starts emitting steam, which will b2 about 4-5 minutes later. 

Allow it to cool for five minutes. The dough will still be warm to touch. This is the ideal time to kneed it. Oil your hands and kneed it into a soft dough.

Now take a medium sized ball of this dough and flatten it gradually using your fingers. Pinch the borders of this disk to form a deep well. Fill it with the ready filling and slowly bring the ends together in a tip at the center of the modak.

Fill your steamer with water and lay a wet handkerchief or a banana leaf on the container where you will keep your Modaks to steam. This will prevent your Modaks from sticking to the container.

Steam the Modaks on low to medium flame for 15-20 minutes. 

Dip them in ghee or tear the tip off and pour ghee in the center before devouring them! May Lord Ganesha shine his blessings on you! 🙂

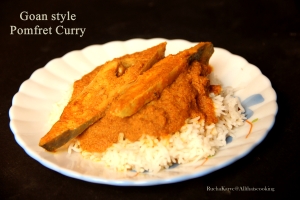
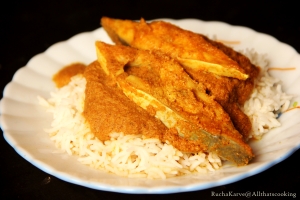
Goan style pomfret curry

While we’re on the subject of vatans, there’s no missing the Goan style of fish curries. If you’ve ever had one, you know they’re tangy, spicy, beautifully saffron and deliciously rich all at the same time and then there’s the fish 😀

IMG_3274

The rains have finally begun in Mumbai and we’re devouring any fresh fish we can lay hands on. This time I was lucky enough to find some beautiful Pomfrets, my little one’s favourite and most convenient for me to serve hubby too. Yes.. both of them need to be helped with the fish eating by removing all bones and separation the flesh. Pomfret makes that part really easy.

You could just as easily replace it with other fishes but the main curry will remain the same. It’s a really simple recipe. all you have to do is grind to paste a handfull of ingredients to make a flavourful paste.This paste, or any ground paste used in the making of various dishes is referred to as Vatan. We have had an introduction to the concept of ‘vatan’ here

If your fish is fresh you need not apply anything to it. However if u plan to store the fish in the freezer, its best to at least apply some salt to it. In this case be careful while adding salt to the gravy as the salt from the fish would also mix with the gravy.
Once again many thanks to Pallavi for this amazing recipe!

IMG_3234

What you will need
2 Pomfrets sliced
3 tbsp coriander seeds
3-4 red chillies
1/2 cup scraped coconut
1 clove garlic, crushed
2 tbsp oil
Lemon size ball of tamrind
Salt to taste
Red chilly powder to taste (optional)

Remove stalk and soak the red chillies and coriander seeds for about 2 hours.
Grind it to paste along with coconut, chilly powder and tamrind. Be sure to add least possible water and make the paste fine. Our Vatan is now ready

Heat oil in a wok. Once hot add the crushed garlic and allow it to brown. Now add the vatan, chilly powder, salt and  water  and let it come to a boil. You’ll have to adjust the water to achieve desired consistency. If it’s too runny allow it to simmer for a little longer.

Now add the clean fish to this curry, cover and allow to cook on simmer. Fishes don’t usually take long to cook, 5 minutes should do.
Ensure your fish is cooked and give the curry a gentle stir while making sure not to break the fish slices, they can be very delicate once cooked.

Hirva Vatan (Green paste)

In the last post we went through the concept of a Vatan which literally translates to  ‘ground (to powder or paste)’

Vatans are  spices and other ingredients, dry or fresh, ground to paste used in the making of various curries and even fried snacks.

image

This time we’ll make a different Vatan.

Hirva Vatan that is green Vatan is a very basic Vatan, one which I prefer making fresh each time mainly because it’s easy peasy. With the previous Vatan the procedure was quite lengthy.. scrape coconut, grate dry coconut, saute, cool, grind.. basically not a quick one. So it makes sense to prepare a big batch and store it. This is a simple grind and use kind of Vatan. Even so, sometimes you might need only a spoon-full of this paste and it might be possible to grind the small quantity in a grinder. You can just as easily store the remaining paste in the freezer compartment for months.

This paste is used as a marinade for all kinds of fishes and meats along with other ingredients. We’ll explore a number of recipes with this Vatan in the future.

image

What you will need
2 cups coriander leaves
13-14 green chillies
20 cloves of garlic, approximately
1 1/2 inch ginger
Salt to taste

Wash all above ingredients and grind to a coarse paste.

Yes. As simple as that. Hirva Vatan is ready

Vatan, introduction to the concept and a recipe

For the longest time I’ve been wanting to post one of the most loved chicken recipes in Maharashtra; Malvani chicken curry. But before that I must elaborate on the concept of vatan.

The chicken curry is based on a thick paste made from various ingredients called ‘vatan.’ Vatan literally means something that is ground and can have many many variations.

Some use dry coconut, some wet, some both.. some add tomato, some ginger and garlic in it, some apply directly to the chicken..basically a little here and there. This paste is of a very thick nature so once ground with very little water it sort of forms a very thick paste, actually something that can be rolled into a ball. It’s often referred to as ‘vatnachi goli’ meaning ‘a tablet of the vatan.’

image

There is a vatan which is used particularly for marination, one for gravy, different types of vatan for different meat gravies and even for sprouts.

We have used one such variation in our Prawns suke recipe.

I agree this is a fairly lengthy and cumbersome process.. scrape fresh coconut.. grate dry coconut, roast everything, cool it down.. grind to paste and then use it..  Which is why most families, including ours, make a good batch of the paste. One that lasts 3-4 dishes and stores it in the freezer.
So next couple of times it takes minutes to get to the good part. The vatan also stores well for months together!

Once vatan is ready, just take oil, chop an onion, add a few spoons of the vatan, add your meat or pulses, water according to how much gravy you want and we’re done.

Let’s slowly explore different kinds of vatan and various dishes that we can cook with them..
Below is a batch of onion and coconut vatan that is used for chicken gravies and pulses.. this one isn’t used for fishes.

What you will need
2 onions, sliced
8-10 green chilles
1/4 cup corriander leaves
1/2 cup grated dry coconut
1/2 cup scraped fresh coconut
2 tbsp oil

Spices
2 Bayleaves
1 Black cardamom
8 peppercorns
3 cloves
2 inch cinnamon

Start with a slightly deep pan and keep a large empty bowl handy.
Take oil in the pan. Once hot add the sliced onion and saute on simmer. Keep stirring from time to time until the onions start to brown. Once u notice browning, take them out in the bowl you have handy. Now similarly saute corriander and chillies, just for a minute and again add them to the onions. Roast the dry coconut until brown and
again remove it in the bowl. Roast the fresh coconut similarly.

Now roast the whole spices on low until you can smell their beautiful aroma.
Allow everything to cool to room temperature before grinding everything to paste with as little water as possible.

Now your vatan is ready to be used and stored.

In case you wish to use any ready garam masala that you might have handy, you can skip the whole spices completely and instead add the masala while you’re frying the vatan.

Will update with recipes that use the vatan soon!

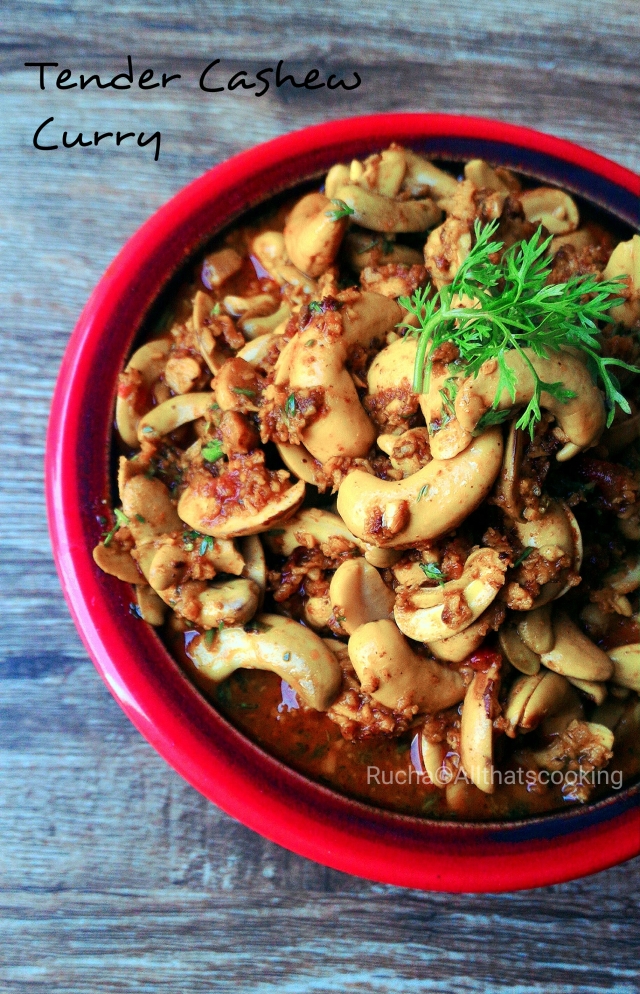
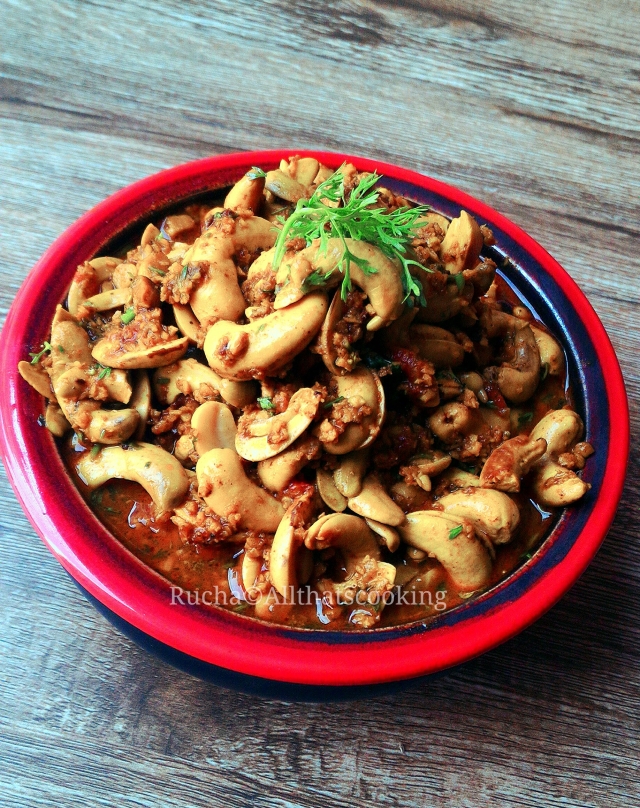
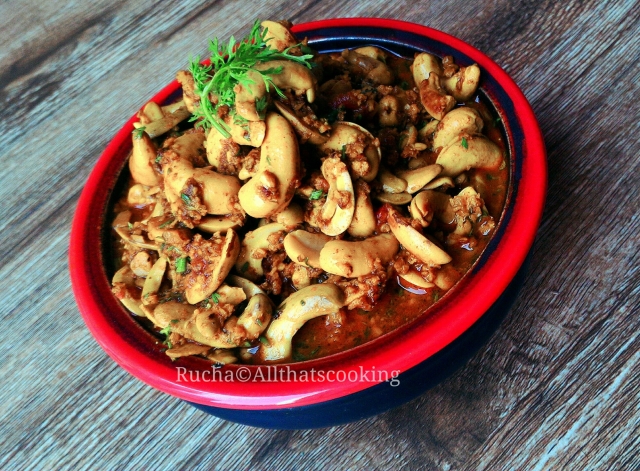
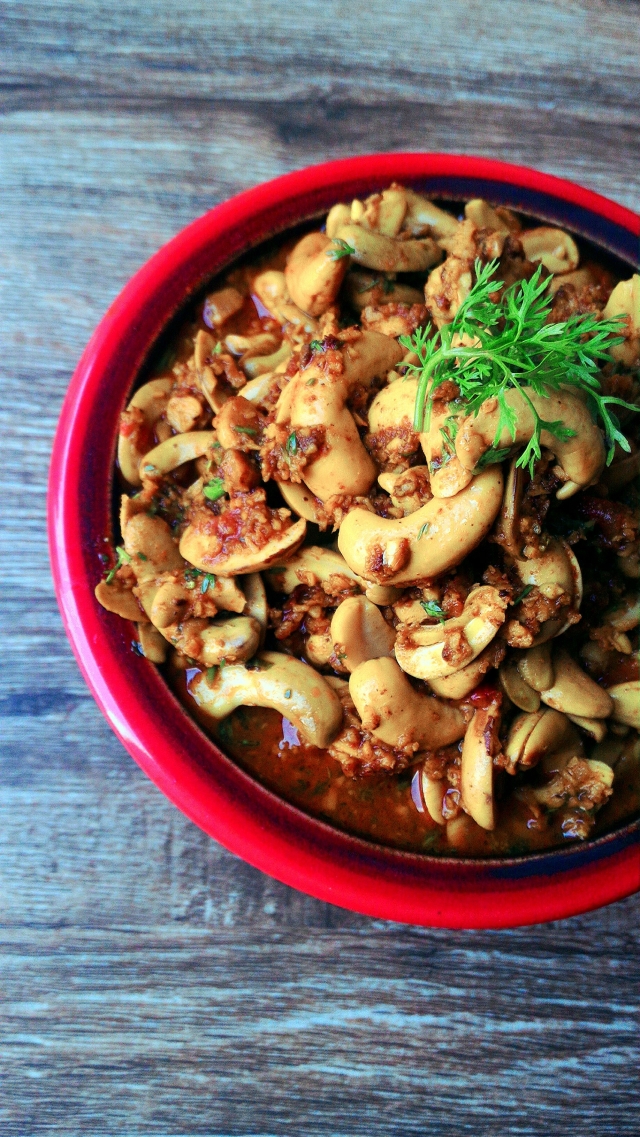
Olyaa kajuchi usal / Tender cashew curry

image

We’re just back from the beautiful coasts of konkan.. Breathtaking sunsets, ancient temples, coastal highways and of course delicious food. Ambe (marathi for mangoes,) juicy tadgole (a kind of palm fruit,) kokam sarbat, prawns, pomfrets… I’m salivating again!

image

On the return journey,we took a halt at a local village market. We were near Ratnagiri which is famous for it’s Hapus (a variety of mango) and wanted to get home some. I was scouting various hawkers and couldn’t believe what I laid my eyes on… Tender cashews!
Tender cashews are a delicacy and a really expensive one at that. I’d never known that tender cashews are cooked in the form of a curry until last year at my aunt-in-law’s.

Varsha Mavshi has a beautiful place in Lanja, konkan. All with a cow shed, cows and calves, hens.. They grow a portion of their own vegetables and grains and have a number of flowering and fruit-bearing trees.. some of which are, you guessed it, cashew trees.

I saw first had how much effort goes into uncovering every single cashew bean. The cashews are hanging from the cashew fruit, inside a hard shell. They need to be sundried for a certain number of days. We can now cut the shell in half with a sharp knife to uncover every single cashew. This is the most tedious process of all and one which causes the peelers palm to blacken. It takes 1-2 days for the hands to come back to normal.

What we get in the market is processed up to this stage. The cashew still has a thin, light brownish film which will has to be removed prior to cooking.

Of course these days everything is mechanized and much easier with technology, but folks at the village go through tremendous efforts for these, which is partly why this dish is a luxury!

I was lucky to have tasted this amazing dish that Varsha mavshi herself had made. The memories came flooding back.. She has been gracious enough to share her family recipe with us here.. I hope you all get to try it soon!

The peeling of cashews takes bit of an effort but it completely worth it. You can add chilly powder according to your individual taste, but the dish is meant to be hot, it tastes better hot and complements the cashews sweetness.

image

Want you will need
2 cup tender cashews (refer notes for options)
3 tbsp oil
1 cup freshly scraped coconut
3/4th cup finely chopped tomatoes
8 cloves of garlic, finely chopped
1 tbsp turmeric
1 tbsp garam masala
1/4 cup finely chopped coriander
Chilly powder to taste
Salt per taste

Heat enough water to cover the cashews in a large pot to like warm. Turn off the heat and soak the cashews for 15-20 minutes.
Now peal the cashews and take off the brownish peal. The cashews now need to washed under running water while being rubbed between your hands to get them nice and clean.

Apply salt, turmeric powder, chilly powder and garam masala to these cashews and set them aside.

Take oil in a pan and add garlic and saute for a few minutes. Now add tomatoes and cook on slow flame until they begin to leave oil. Remember to stir every now and then.
Continuing on the slow flame, add the marinated cashews to the tomatoes, cover the container with a deep dish and pour a cup of water in the dish. Be careful not to pour water into the cashews.

image

This is an age old technique of cooking stir fried vegetables without getting them to stick to the pan or having to stir continuously. The vegetables inside cook on the steam that comes from the water in the plate above and don’t stick to the pan or get burnt until there is water in the dish above.

In about 7-10 minutes the cashews will be cooked.
(This is when the kids, mine and neighbors, came peeping in the kitchen to see what that aroma was!)

Now add the fresh coconut and stir for 5-6 minutes. Be careful not to break the cashews. Add as much water as you would like to have for gravy, adjust the salt and bring it to a boil. Add coriander, mix well and serve hot with roti or rice.

image

NOTE: You can soak equal quantity of dry cashews for 5-6 hours and use instead of tender cashews. I haven’t tried this version, but is said to taste equally good.

Kolmichi Bhaji (Prawns curry)

If there’s any food that can surely, consistently, positively be loved by everyone at all times, it has to be a soulfull home-cooked meal. Something grandmoms and moms have made for generations, something that is devoured in their homes for decades, beats any restaurant dish hands down.

image

It is this home-cooked magic that always has me on the lookout for more and more family recipes..
This week after dropping A to school, I headed directly to the fish market. I couldn’t lay my hands on the larger variety of prawns which are a staple at home and instead got ones which are on the smaller side. While I cleaned them and got some other chores done, it was already time to pick A up from school and I asked a dear friend (who happens to be a mom to one of A’s classmates) about how she makes them. Mind you, they are fish-crazy (and nonveg loving family) and her mother-in-law is supposed to be brilliant cook!

She shared this recipe which was simple and quick and used prawns in combination with green capsicum, which had me intrigued. I’d never used Prawns with another vegetable for an Indian recipe, except onion and tomato for gravy and it turned out superb! Definitely something that’s gonna be a staple at home henceforth! Swiny, thank you for this!! 🙂

I’ve used Sunday masala in Murg Hoteli before. Just to specify, this is the Bedekar Sunday Masala that I’ve used. Also the recipe that Swiny shared didn’t use any Kokam. I am however in the habit of using kokam while marinating prawns for most dishes and it did work very well here.

image

What you will need
1 cup prawns, cleaned and deveined
2 medium onions, chopped finely
1 large capcicum, diced to large pieces
2 medium tomatoes, diced to medium pieces
2 tbsp ginger garlic paste
2 tbsp turmeric powder
2 tbsp sunday masala/chicken tandoori masala
4 tbsp oil
2-3 pieces of kokam(optional)
Salt, to taste
2 tbsp Chilly powder (or to taste)

Marinate Prawns with ginger-garlic paste, 1 tbsp turmeric, 1 tsp salt and the kokam pieces. Massage the prawns with the spices gently and allow to rest for atleast 30 minutes.

Heat oil in a pan, add the onions and capsicum together and saute. Cover and allow it to cook till the onions are soft and pink. Now add the marinated Prawns and give it a stir before covering it again for a few minutes until the prawns are cooked. Now add the tomatoes and again cover and allow to cook for about 5-6 minutes.
Add turmeric, salt, sunday masala/tandoori masala and chilly powder, give it a stir and again let it cook for 5.

image

Add water according to desired consistency and allow to come to a boil. Kolmichi bhaji is ready. It’s a great accompaniment to both roti and rice

Strawberry Roulade

Isn’t there something about those bright little strawberries that just tugs at your heart? First of the season and here I was, picking boxes and all.

IMG_2796

Strawberry roulade had been on my mind for long and I’m glad it finally materialized! This is nothing but a vanilla flavored cream swiss-roll, with a strawberry flavored
The sponge was perfect! Soft, fluffy.. With the whipped cream, strawberry filling, that occasionally had spotted pinkish streaks thanks to those pink babies!

IMG_2824

What you will need
50 gms Castor sugar
2 eggs
50 gms all purpose flour
1/2 tsp baking powder
a pinch of salt
1/2 tsp vanilla extract
1 cup whipping cream
4 tbsp cream cheese(optional)
1 cup strawberries, chopped finely

IMG_2851

Preheat the oven to 180 C
Line the baking tray with buttered parchment paper.

Sift together flour, baking soda and salt.

Take eggs,vanilla and sugar in a bowl and whisk with a beater for 5 minutes on high. The mixture will be light and frothy and pale in colour.
Fold in the flour mixture little by little.
Once all the flour is incorporated, pour it in the baking tray and bake for 5-8 minutes at 180 C.
If the sponge in nice and springy to touch, our base is ready.
Flip the cake immediately on a wet kitchen towel and carefully peel the parchment paper off the cake.
Ever-so-carefully, roll up the cake immediately while allowing it to cool.

Whisk the whipping cream and add the chopped strawberries to it.
Once cool, unroll the cake and spread a layer of the cream mixture before carefully rolling it up again.

IMG_2809

Sprinkle with powdered sugar if you like, or slice as is. Your strawberry roulard is ready!